


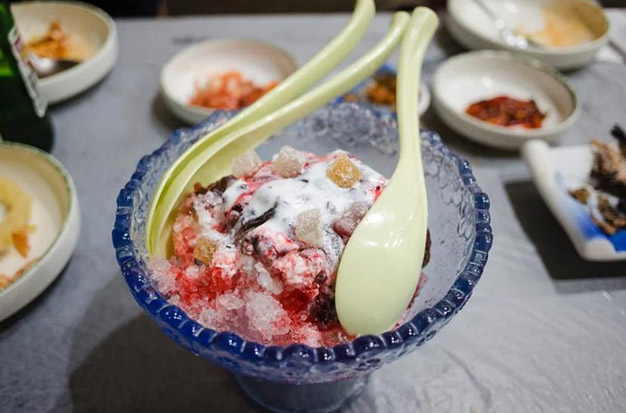
Have you ever wondered how to make homemade shaved ice? How to make one is explained in this article.
Six Effective Methods For Making Shaved Ice
Method 1: The Pound And Crush Technique
We understand that shredding ice without a machine appears to be a lot of work, but it doesn’t have to be. The first method, which we’ll refer to as the “pound-and-crush method,” is the simplest way to make a delicious ice dessert from scratch.
Ingredients
- A water-tight ziplock bag
- A rolling pin or a mallet
- Water
Instructions
- Before freezing in the refrigerator, fill the ziplock bag to about ¼ with water (or flavor-infused water) and tightly seal it. Make certain that the bag is flat on the ground. The flat shape of the frozen ice can facilitate crushing.
- Once the ice is prepared, use a rolling pin, a mallet, or any other hard kitchen tool that can be used for pounding to pound and crush the ice.
- Up until you achieve the texture and consistency you want, continuously pound the ice.
- Once the ice is piled high in a bowl, flavor it with syrup, condensed milk, or other toppings.
Pros: Aside from simply pounding ice with kitchen tools that you can readily find in your home, this technique also serves as a great stress-reliever. To understand what we mean, just picture yourself having complete freedom to beat all of your stress to pieces. The best base for your shaved ice dessert can also be made using this method, which is the simplest.
Cons: How you crush the ice with the tools you use will have a significant impact on the consistency and texture of the ice. You can’t really achieve the level of smoothness that kakigori, a Japanese shaved ice variation, is most famous for, unlike when using professional ice shavers.
Method 2: Fork Your Way To A Sumptuous Dessert
This technique will come in handy if you’re hesitant to use sharp knives and can’t find your mallet. The second method is similar to this one, but instead of using a knife, you just need a fork with sharp teeth to do the ice scraping. To make the most of this ice shaving technique, just give your ice some time to thaw.
Pros: If using a fork has any advantages over using a sharp knife with a cutting blade, it is that forks are much safer. Additionally, since forks are a common household item, it will be very difficult for you to not find one that you can easily use.
Cons: You don’t even have to try this process to realize how time-consuming it can be. Using a fork can actually require a lot more patience and effort than the other methods on our list.
Method 3: Slice And Crush
Ever consider using a knife to teach you how to make shave ice without a machine? A knife’s uses are not just limited to cutting and chopping. You can skip the pricey kitchen appliance that is frequently used for shaving ice if you have a sharp knife on hand.
Ingredients
- A sharp knife (or a samurai sword if you have one)
- An ice mold or a square container
- A clean cloth
- A cloth glove or, ideally, a protective chain glove
- Water
Instructions
- You must first make a block of ice by adding water to a square container or an ice mold, then freezing it.
- The ice should be taken out of the freezer and allowed to thaw for six to ten minutes after being left there for a while. The ice will be much easier to scrape if you take this crucial step.
- Get ready with your knife, gloves, and cloth as you wait for the ice to thaw. Use this opportunity to sharpen the knife’s blade if necessary for the ice scraping process.
- The ice should then be covered with a fresh cloth to prevent slipping after it has thawed. To avoid ice burns, always handle ice while wearing a hand glove.
- Slice the ice thoroughly in quick, repeated motions after it has been placed. Just proceed with caution as the ice is prone to sliding.
- Scrape your chosen quantity of ice into a bowl, then top with syrup and toppings.
Pros: In comparison to using a mallet to pound the ice, using this do-it-yourself ice shaving method is the most affordable way to make a homemade dessert with better consistency and texture.
Cons: First of all, due to the risk of injury from slipping ice, this method is not suggested for children or people with no prior experience handling sharp objects. Furthermore, rigorously cutting ice can be intimidating, in contrast to pounding it. But hey, go for the golden ice if you’re game! Just wear your gloves and be extra careful.
Method 4: Use An Ice Chipper
Ice picks and ice chippers are excellent tools for breaking up large blocks of ice.
Trust us when we say that this is the ice pick to buy; we’ve looked into a LOT of different ones. And if you don’t trust us, just read the reviews.
The molded rubber grip on this chipper is excellent, and it feels heavy in the hand. A well-made, long-lasting tool should result from this. Apparently, these are also great for breaking up frozen fruit for smoothies!
Ingredients
- An Ice Chipper
- A large ice mold or plastic bag to freeze the water in
- A clean cloth
- Protective hand glove (optional but again, highly recommended)
- Water to freeze
Instructions
- Freeze water in a large bucket or mold
- Taking the frozen block out of the mold, set it on top of a clean towel on a stable surface (to reduce slipping).
- Carefully chip the ice block and retain the chips into a bowl or cup
- (Optional) Put the chips into a zip lock back and crush them further with a hammer
Pros: Something you may already have at home, inexpensive.
Cons: challenging to master. The size of the ice chunks will be very erratic.
Method 5: Use An Ice Pick (or In A Pinch, A Screwdriver)
A flat head screwdriver or an old ice pick might be available. That’s perfect for chipping some ice, I tell you!
However, this option will result in very large chunks, which is a disadvantage. If you want finer crushed ice, you might prefer to start with this method and then crush the ice even more in a plastic bag with a mallet or rolling pin (like step 1).
Also, this is pretty dangerous, so please be careful! Of course, doing this while inebriated or otherwise buzzed is not a good idea.
Ingredients
- An ice pick or clean flat head screwdriver
- A large ice mold or plastic bag to freeze the water in
- A clean cloth
- A protective hand glove (optional but highly recommended)
- Water
Instructions
- Freeze water in a large bucket or mold
- Remove frozen block from mold, then set it on top of a clean towel on a stable surface (to reduce slipping).
- Carefully chip the ice block and retain the chips into a bowl or cup
- (Optional) Put the chips into a zip lock back and crush them further with a hammer
Pros: inexpensive and perhaps something you already have at home
Cons: challenging to master. Ice chunks will have a very erratic size.
Method 6: Shave It Manually With An Ice Shaver
Manual ice shavers are less frequently seen in people’s kitchens now than they once were due to the affordable rise of electric ice shaving machines. But that doesn’t mean that these tools aren’t a fantastic, portable option for making your own ice.
It’s true that not everyone has one of these in their home, but if you do, it’s completely functional. Otherwise, you can buy them on Amazon for a very low price. We love the one we purchased, which is this. Since it was cast from solid aluminum, it will never rust.
Visit this post for details on how to use manual ice shavers, how to keep them in good working order, and a list of our favorites.
Ingredients
- A manual ice shaver (we have and love this one)
- A large ice mold
- A clean cloth
- A hand glove (optional)
- Water
Instructions
- Basically, this technique provides you with the quickest and most effective way to prepare shave ice desserts at home. In order to easily shave more ice, you must use a large container this time, as you would with other methods that require you to first freeze water.
- When the ice block is prepared, allow it to defrost for roughly 6 to 10 minutes.
- To keep it from sliding, place the ice under a clean cloth or in a container that is tightly closed. When working with ice, once more, wear a hand glove.
- While holding the ice in place, place the ice shaver on top of the ice block.
- Pushing the razor away from you will cause it to scuff up the ice. Continue doing this until the ice shaver’s storage compartment is full. Empty the compartment and proceed to run through the ice in a similar manner if you need more shaved ice.
- Finally, place the molded ice in a bowl and add your preferred ingredients.
Pros: They are inexpensive, portable, and energy-free. Even the beach is a good place to take it!
Cons: To get the ice shaving just right, you might need to slightly adjust and sharpen the blade. Additionally, they do require some practice to master.