

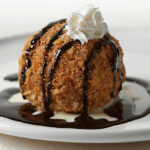
Have you ever heard of fried ice cream? This is an easy dessert to make at home, which is becoming more and more popular all over the world. Specifically speaking, fried ice cream is a sweet dish consisting of a scoop of ice cream that has been frozen solid, covered in a crispy coating or batter, and then quickly fried in hot oil to create a crispy exterior while maintaining a cool interior. It has the perfect balance of creamy and crispy.
You must try the fried ice cream at home if you’ve never done so. The contrast between the heated, crispy shell and the cool, creamy ice cream is what makes this dish so much fun to consume. The covered ice cream may be stored in the freezer for two days, making it ideal for preparing ahead of time.
Some claim the invention of fried ice cream occurred in 1894 in Philadelphia, while others assert it first appeared at the Chicago World’s Fair in 1893. Some claim that the invention of fried ice cream as a dessert in Japanese tempura restaurants dates back to the 1960s. It’s a favorite dessert at American restaurants serving Mexican food. Whatever its history, it’s a tasty delicacy that both children and adults will adore. Fried ice cream is a delicious treat that will alter your course! Or perhaps simply the week’s dessert plans.
What You Need to Prepare for Fried Ice Cream
- Ice Cream: I use vanilla ice cream, while you can use other flavors. A high-quality ice cream made with real dairy is ideal.
- Sugar: I like to use white granulated sugar for this recipe.
- Eggs: The egg whites help the cornflakes adhere to the fried ice cream. Save the egg yolks and make my lemon bars!
- Oil: Use a neutral oil to fry the ice cream in as you do not want the ice cream to take on the flavor of the oil.
- Cereal: You’ll need some finely crushed corn flakes to roll the ice cream in.
- Vanilla Cookies: Finely crushed vanilla sandwich cookies (like Golden Oreos) are added to the crushed corn flakes to create the fried shell.
- Cinnamon: Ground cinnamon adds a delicious toasty flavor to the fried ice cream.
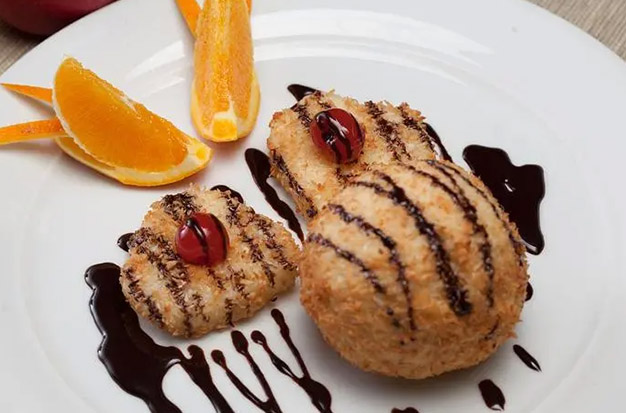
- Optional Garnishes: Whipped cream, sprinkles, maraschino cherries, cinnamon sugar, caramel sauce, or chocolate sauce.
How to Make Fried Ice Cream(Step-by-Step)
It takes a little work to make fried ice cream at home, but the method is not difficult. There just has to be a lot of freezing and waiting. but it’s unquestionably worthwhile! Even the busiest folks may fit this wonderful dessert into their plans because the active prep time is only about 15 minutes.
Here’s how to go about it:
- Make balls of your preferred ice cream with an ice cream scooper. Put them on a baking sheet that has been lined with parchment.
- For at least 15 minutes, place the ice cream balls in the freezer to help them harden.
- Danish Creamery butter should be melted in a pan or skillet over medium heat while the ice cream balls are chilling in the freezer.
- Crushed cornflakes, cinnamon, sugar, and salt should be added to the pan. Stirring continuously, cook this mixture for around 3 to 5 minutes. It should roast a little bit and turn golden brown.
- To prevent the corn flakes mixture from burning and sticking to the pan, it is crucial to whisk constantly.
- The corn flakes combination should be poured into a small bowl after the pan has been taken from the heat. Let this cool and set aside.
- Prepare your fried ice cream by chilling the ice cream balls and cooling the fried corn flakes. The corn flakes mixture should be used to completely coat the ice cream balls.
- Serve with the fried ice cream toppings of your choice.
Tips for Successful Fried Ice Cream
Fried ice cream at home initially seems challenging (and nearly impossible?) but now that you realize it, you can accomplish it without a problem.
Additionally, it becomes less challenging if you have a few secret tips and tactics at your disposal:
- Keep an eye on the oil’s temperature. If the oil level is too high, the shell may split, and the ice cream will leak into the oil.
- The key to effectively frying your ice cream scoops is that the ice cream must be absolutely frozen. Once it has been coated with the egg mixture and the cookie crumbs, freeze it until it is solid once more.
- Fry 1-2 Scoops at a Time: Make sure your Dutch oven isn’t too full so that each scoop has room to fry entirely.
- Fried ice cream should be served right away because it melts quickly. Until you’re ready to consume them, store the coated balls in the freezer.
- An ice cream scoop makes it easier to create ice cream balls of the same shape. You can delicately mold spoonfuls of ice cream with your hands if you don’t have an ice cream scoop. Gloves will help prevent the ice cream from melting too soon due to your hands’ warmth.
FAQ:
Why Doesn’t Fried Ice Cream Melt?
Since the ice cream is frozen solid at a very low temperature, covered in a crispy batter or shell, and then swiftly immersed in hot oil, fried ice cream doesn’t melt. Due to this, the outside can become crispy and cooked before the ice cream center.
Can I Use a Different Flavor of Ice Cream?
Yes! The beauty of making fried ice cream at home is that you can use whatever ice cream flavor you want. Just make sure the ice cream flavor complements the cinnamon in the fried corn flake coating.
What Else Can I Serve with the Ice Cream?
You can top the ice cream with caramel sauce, sprinkles, fresh berries, honey, cinnamon, sugar, and small chocolate chips in addition to the toppings. Therefore, you can enjoy your unique fried ice cream while staying at home.
Is Fried Ice Cream Really Mexican?
Although Americans frequently associate fried ice cream with Mexican restaurants, the dish really has roots in Japanese tempura restaurants as well as American state fairs. The Mexican restaurant company Chi introduced Chi’s fried ice cream to its menu in the 1980s, but it probably first appeared much earlier. Fried ice cream is frequently linked in the United States.
Read more about: How to Make Red Wine Ice Cream