

One of the appliances you probably don’t give much thought to is our ice maker, especially if it’s integrated into your freezer system. The ice maker is frequently forgotten, neglected for a very long time, and then all of a sudden, you suddenly remember it clearly…and not for good reasons. It’s time for cleaning if your ice cube maker is producing stinky cubes or is clogged.
You may want to think about cleaning your ice maker even more frequently if you have hard water, which can lead to buildup and eventually reduce the functionality of your appliance.
But first, empty your fridge and freezer of unnecessary goods before you start cleaning. The best-tasting ice is produced by a clean appliance, and those dubious leftovers from last week that are still lurking in the back of your fridge could be one unexpected cause of smelly, hazy, or strange-tasting cubes. It’s critical to keep an eye on what’s in your refrigerator because food can impart flavor and odor to ice.
Fortunately, cleaning an ice maker is not too difficult. especially after reading this post, which will walk you through a thorough description of the upkeep task.
Differences between an Ice Maker and Ice Machine
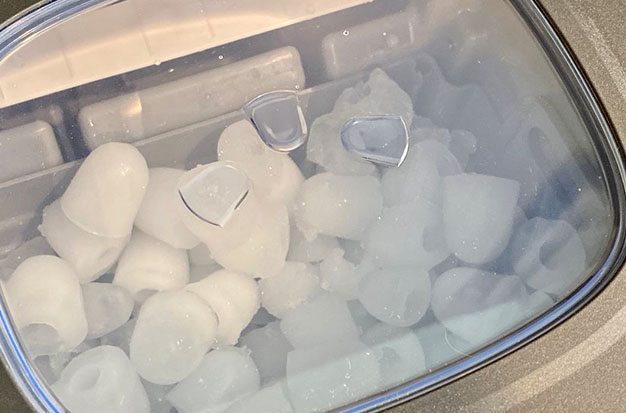
Although the terms ice maker and ice machine are sometimes used interchangeably, they are not the same. A refrigerator freezer’s ice maker is the component that uses convection to create small batches of ice. Air takes away the heat when water is poured into molds, causing the ice to slowly freeze. Most households’ daily needs are met by retrieving ice from a door dispenser or directly from the freezer ice bin.
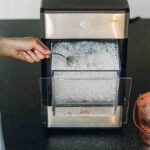
Ice machines, on the other hand, are independent gadgets that create ice through conduction. Home ice makers are independent units, much like the bigger ones used in restaurants, and are not connected to a fridge or freezer. Smaller, portable variants can rest atop a surface, while larger ones are installed under the counter. Cold metal prongs are automatically put into molds once the water has been dispensed into them, freezing the water more quickly than ice producers can. Ice machines are perfect for entertaining a crowd or for larger families who consume more ice frequently due to the higher quantity of ice they create.
Why You Need to Clean Your Ice Maker
The first thing you need to do in this situation is realized how crucial having a clean ice maker is. Here are some justifications for why having a clean ice maker is good for you:
Pure ice: By keeping your system clean, you can ensure that your ice cubes are free of minerals and debris, which are the two primary reasons why they have a musty flavor and pose health risks. Evidently, it is not very appealing when some unknown objects in your water become visible to the naked sight.
Longer lifespan: If an ice maker isn’t serviced on a regular basis, rust and dirt might start to choke it up. Even worse, limescale and mold will accumulate, which will undoubtedly make the process of making ice more challenging. Therefore, giving this kitchen equipment more frequent attention might be beneficial in extending its total lifespan.
How Do Ice Makers Get Dirty
Despite being chilly environments, ice makers and ice machines can nonetheless host harmful microorganisms. A variety of sources can quickly produce bacteria in ice makers.
These elements may promote the growth of bacteria, mold, and mildew:
- soiled hands touching the ice
- crumbs from spilled food or beverages
- ice formed from filthy water that has melted
- gathered dust and dirt
Can you get sick from mold in an ice maker? Yes, mold can harbor bacteria and viruses such as the common cold, norovirus, and E. coli. Fortunately, by getting rid of dirt and bacteria, learning how to clean an ice maker and ice machine helps reduce the likelihood of getting sick. However, there are distinctions between these two gadgets that require various cleaning techniques.
How to Clean Your Ice Maker Thoroughly
Cleaning your ice maker can begin once spills have been cleaned up and any nasty materials have been disposed of. This is the procedure.
Cut the Refrigerator’s Power.
You don’t need to move everything to a cooler unless you’re cleaning in the sweltering summer heat or want to leave your home in the middle of the process.
It won’t take long to clean, but you don’t want the ice maker to be producing ice while you’re in there. Depending on the model, you could be able to turn off the maker by lifting an arm or a lever, or you might use an on/off switch that is located on the side or at the back. The best course of action is to entirely disconnect it, though.
Thoroughly Clean the Ice Cube Freezer
You might be able to remove your ice cube maker bin by pulling it out like a kitchen drawer, or you might have to lift it up first. the sink with the ice (or garbage disposal). Go ahead and remove any more items that you can do so without using any tools, such as a drip tray, at this time.
One crucial point: Never put plastic items from your freezer in the dishwasher; instead, hand washes them. Wash and clean any removed components using a washcloth and warm, soapy water, or with a few tablespoons of baking soda dissolved in a gallon of warm water. Prior to returning them, thoroughly rinse them and set them aside to air dry.
Clear the Ice
Use warm water on a washcloth to help melt and remove any ice that has frozen to the ice maker itself. If you want to break up the ice without damaging the device, you could alternatively (carefully!) use an ice pick.
When the ice is gone, clean as much of the ice maker’s exterior as you can using a washcloth dipped in warm, soapy water or a mixture of distilled white vinegar and water. Then use a toothbrush to reach any areas that the washcloth can’t reach.
To remove any remaining moisture from the ice maker, use a dry washcloth. Before you put it back together, it needs to be dry.
Check Your Filter
Your ice maker may have a water filter that you are unaware of. Because of all those minerals, if it gets blocked, it won’t let as much water through, which will affect how well the machine works. The cause of the bad ice in my own ice machine is probably an old filter. Keeler suggests changing water filters every six months. Observe the instructions from your manufacturer. (Changing the batteries in your smoke detector at the same time is a nice reminder.)
Run Several Cycles
Reconnect the refrigerator’s power cord or restart the ice maker. After letting the ice cube cycle run twice or three times, remove the cubes. In fact, starting now, remove and discard any unwanted ice cubes every few months because they collect any scents in your freezer.
Practical Tips
There are a few crucial considerations you need to keep in mind when cleaning.
- Before replacing anything, make sure it is completely dry because any un-dried component could lead to an electrical leak. Give the ice bin and the other components you removed time to completely dry out.
- Read the instruction manual completely: There are various methods to use with various ice makers. As a result, the kind and function of your system strongly influence how to maintain it. You should follow the recommendations in the manual because some devices may need manual cleaning while others may have an automated system.
- Use a cleaning solution that is truly safe for your equipment rather than chemicals; avoid using chemicals at all costs. Since these elements not only harm your system but also put the health of your family at risk.
- Maintain frequent cleaning. If the maintenance is neglected, it could result in the growth of harmful mold and slime, which could impair operation. In order to ensure an effective machine, it is a task worth performing at least once every four to six weeks.