


Soft serve ice cream is typically only offered at fast food establishments; it is rarely served at home. For the majority of people, eating out is a special occasion. You can make your very own soft serve at home, which may seem impossible. The soft serve can be made with just a few straightforward ingredients if you have an ice cream maker. If you don’t, you can still achieve similar results by using dry ice and an electric stand mixer. The latter option produces results that are a little smoother and more “authentic,” but it also requires a little more effort.
What Is Soft Serve Ice Cream?
It’s unclear who invented this delicately textured, transient treat, with both Carvel and Dairy Queen claiming credit. According to one legend, Tom Carvel, the man who founded Carvel, experienced a flat tire in 1934 while operating his ice cream truck in Hartsdale, New York. He started selling his melting product to onlookers right away because he was always a businessman. On the spot where his unlucky tire incident occurred, the legend claims that he opened his first shop two years later. He also created a low-temperature ice cream maker in the process.
In another version, Dairy Queen transformed an “all-you-can-eat” experiment in 1938 into a ground-breakingly sweet moment when they sold 1,600 servings of soft serve in Illinois. The former English prime minister Margaret Thatcher is referred to as the “mother of soft serve” in a third account, which claims that while she was a food chemist, her business collaborated with Mister Softee to develop a soft-serve recipe.
Difference Between Soft Serve And Regular Ice Cream
The only difference between ice cream and soft serve (GOOD soft serve) is the amount of fat. The butterfat content of soft serve ice cream ranges from 8 to 11%, while super-premium ice cream (which receives a USDA rating) has a butterfat content of 16 to 29%. Although butterfat—even that 29 percent—is essential for taste and mouthfeel, too much of it will dull your sense of flavor and make you feel as though you’re chowing down on a stick of butter.
The centrifuge action of the machine causes butterfat that has too much butterfat in it to ball up and spin away from the molecules that bind it. We refer to this as “buttering out.”” It tastes like real butter when you eat ice cream that has been “buttered out.” Due to the centrifugal force of the spinning blade, you want to prevent the soft serve mixture from “buttering out” by maintaining the butterfat level below that level.
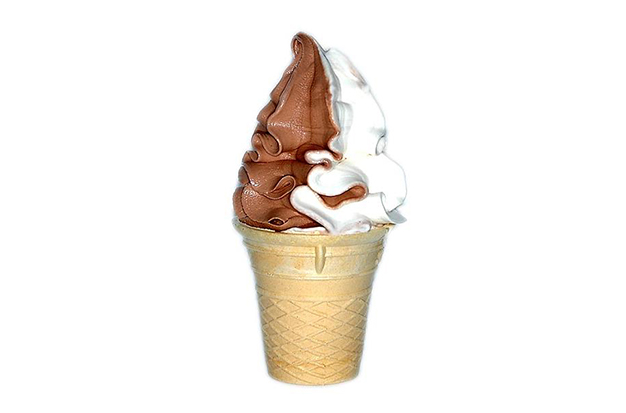
What Makes Soft Serve So Alluring?
Making it is more fun! “When compared to dipped ice cream, creativity is far more instantaneous and fluid, says Malek. “When you make scooped ice cream, you have to plan a day in advance, spin it the next day, wait for it to harden overnight, and then scoop it the next day, so it’s really a three-day process.” However, soft serve allows for the flexibility of combining a few ingredients, running it through the machine, and tasting it five minutes later. “We are always experimenting in a fluid way, and it’s so satisfying to be able to make changes as they arise.”
How To Make Soft Serve Ice Cream?
Ingredients
- 1/2 cup milk
- 1/2 teaspoon vanilla
- 1 tablespoon sugar
- 2 tablespoons chocolate sauce (optional)
- 4 – 6 cups crushed ice
- 1/4 cup salt
- 2 quart-size plastic food storage bags
- 1 gallon-size plastic freezer bag
- 1 hand towel or gloves
Instructions
- In one of the quart bags, combine the milk, vanilla, sugar, and chocolate (if using). Air should be kept to a minimum inside the seal. Put this bag inside the other quart-sized bag and seal it.
- Place the gallon-size bag’s double bagger bag inside of it, then add ice to the large bag. Salt the ice. Seal.
- Ice should surround the cream mixture and start to freeze after the bag has been wrapped in the towel or massaged while wearing gloves. You ought to have soft serve in 10 to 15 minutes, depending on your touch. (For ice cream that is firmer, extend the amount of time it spends freezing in your freezer.)
Tips For Making The Best No-machine Soft Serve Ice Cream:
- By freezing your bowl, you can ensure that your soft serve ice cream stays icy throughout the process. Before making ice cream, place your bowl in the freezer for an hour.
- When handling dry ice, put on insulated, protective gloves made of latex, nitrile, or leather.
- The dry ice shouldn’t be added to your ice cream base too quickly. If not, your workspace will become covered in a large pile of bubbling ice cream. Go slowly.
- You can prepare your ice cream base up to 3 days in advance because this recipe keeps well in the refrigerator.
- Put your soft serve ice cream in the freezer for up to one and a half hours if you’re not going to eat it right away to preserve the texture. Don’t leave it in for too long or it may freeze solid and lose its soft texture.
What Sort Of Cream Is Best?
You can use different types of cream, such as heavy, whipping, or all-purpose cream. While any of these creams will work, I advise using heavy cream because it intensifies and enriches the vanilla flavor.
Make your own homemade whipped cream to go with your homemade soft serve ice cream if you want to go the extra mile! For more baking inspiration, take a look at my other homemade cream recipes.
What Additional Flavors Are Available For My Soft Serve Ice Cream?
The world is your playground if your ice cream has a vanilla base. To spice things up, you can add flavorings like cocoa or matcha powder. The measurements will need to be adjusted as you go, though.
Toppings like fruits, chocolate, and nuts can be added to homemade soft serve ice cream. To see all the beautiful chunks in your mixture, make sure to fold these into the ice cream base. For ideas on toppings and flavors, check out this article!

Conclusion
Malek advises using your ice cream maker to create soft serve at home. When serving the ice cream, keep in mind that it should still be soft and only slightly frozen enough to hold its shape. Simply place it in a pastry piping bag and squeeze to create the traditional soft-serve swirl.